Author: Vigor Forty Editorial Team
Medically Reviewed By: Editorial Review Board
Disclaimer: This article is for informational purposes only and is not a substitute for professional medical advice. Read our full Medical Disclaimer.
📌 Key Takeaways
- The squat is the king of lower-body exercises: It builds strength in your quads, glutes, hamstrings, and core while improving mobility, bone density, and functional fitness.
- Proper form is non-negotiable: A bad squat is not just ineffective—it’s dangerous. Poor form stresses your knees, hips, and lower back, increasing injury risk.
- Depth matters: Aim for at least parallel (thighs parallel to the floor). Going deeper activates more muscle fibers and improves mobility—but only if you can maintain form.
- Your squat should look different from others: Anatomy—hip structure, femur length, torso length—influences your squat mechanics. Don’t try to copy someone else’s squat perfectly; find your optimal stance.
- Start light, progress slowly: Master the movement pattern with bodyweight or very light weight before adding load. Your joints and connective tissues need time to adapt.
Introduction: The Foundation of Lower Body Strength
The squat is arguably the most important exercise you can do.
It’s a fundamental human movement—the pattern of sitting down and standing up that you perform dozens of times a day. It builds strength in the largest muscles of your body. It improves mobility, balance, and bone density. And it translates directly to everyday activities: getting out of a chair, climbing stairs, picking up children or grandchildren, and maintaining independence as you age.
But here’s the problem: many people squat incorrectly.
They lean too far forward. They don’t go deep enough. Their knees cave inward. They round their lower back. These mistakes don’t just limit results—they put your knees, hips, and lower back at risk.
This guide will teach you everything you need to know about performing a perfect squat—whether you’re using just your body weight, a pair of dumbbells, or a loaded barbell. You’ll learn proper form, common mistakes, variations for different levels, and how to program squats into your routine.
Section 1: The Muscles Worked
The squat is a compound exercise that engages multiple muscle groups:
| Muscle Group | Primary Role |
|---|---|
| Quadriceps (Front Thighs) | Primary knee extensors; drive the upward phase |
| Glutes (Maximus, Medius, Minimus) | Hip extensors; drive the upward phase; stabilize the hips |
| Hamstrings (Back Thighs) | Assist hip extension; stabilize the knees |
| Erector Spinae (Lower Back) | Maintains a neutral spine throughout the movement |
| Core (Transverse Abdominis, Obliques) | Stabilizes the spine; transfers force |
| Adductors (Inner Thighs) | Stabilize the hips; assist in the movement |
| Calves (Gastrocnemius, Soleus) | Stabilize the ankles; assist in balance |
Section 2: The Perfect Squat—Step by Step
The Setup
- Foot Position:
- Stand with your feet slightly wider than shoulder-width apart
- Toes turned out about 10–15 degrees (not straight forward)
- Weight distributed evenly across your entire foot—not just your heels or toes
- Find Your Stance:
- Everyone’s anatomy is different. Your optimal stance depends on your hip structure, femur length, and torso length.
- Experiment with different widths and toe angles. A good starting point: feet shoulder-width apart, toes slightly out. Adjust until you feel stable and balanced.
- Head and Neck Position:
- Look straight ahead or slightly down (about 6–10 feet in front of you)
- Keep your neck in a neutral position—don’t look up or down excessively
- Torso Position:
- Keep your chest up and proud
- Pull your shoulder blades together and down
- Maintain a neutral spine—slightly arched, not rounded
- Core Engagement:
- Brace your core as if someone is about to punch you in the stomach
- This creates intra-abdominal pressure that protects your spine
The Descent
- Initiate the Movement:
- Break at your hips and knees simultaneously
- Push your hips back as if sitting in a chair
- Keep your weight centered over your mid-foot—not shifting to your heels or toes
- Control the Descent:
- Lower yourself in a controlled, steady motion
- Don’t drop or bounce at the bottom
- Your knees should track over your toes (or slightly outside)—not cave inward
- Depth:
- Aim for at least parallel—your hip crease should be at or below the top of your knees
- Going deeper (ass-to-grass) activates more muscle fibers but requires more mobility
- Stop your descent if you feel your lower back rounding or your heels lifting off the floor
- Chest Position:
- Keep your chest up and proud throughout the descent
- Don’t let your upper back round or your chest collapse forward
The Ascent
- Drive Through Your Feet:
- Push through your entire foot—especially the mid-foot and heels
- Think about “pushing the floor away” rather than “lifting the weight”
- Extend Your Hips and Knees:
- Drive your hips forward as you stand up
- Keep your knees tracking over your toes
- Maintain a neutral spine—don’t hyperextend at the top
- Maintain Tension:
- Keep your core braced throughout the ascent
- Don’t relax at the top—prepare for the next rep
- Full Lockout:
- Stand fully upright at the top
- Squeeze your glutes briefly (but don’t hyperextend your lower back)
Section 3: Key Squat Variations
Bodyweight Squat
Perfect for: Beginners, warming up, mobility work, or when equipment isn’t available.
- Stand with feet slightly wider than shoulder-width, toes slightly turned out
- Keep your chest up, core braced, back straight
- Lower your hips back and down as if sitting in a chair
- Go as deep as your mobility allows while maintaining a flat back
- Drive through your heels to return to standing
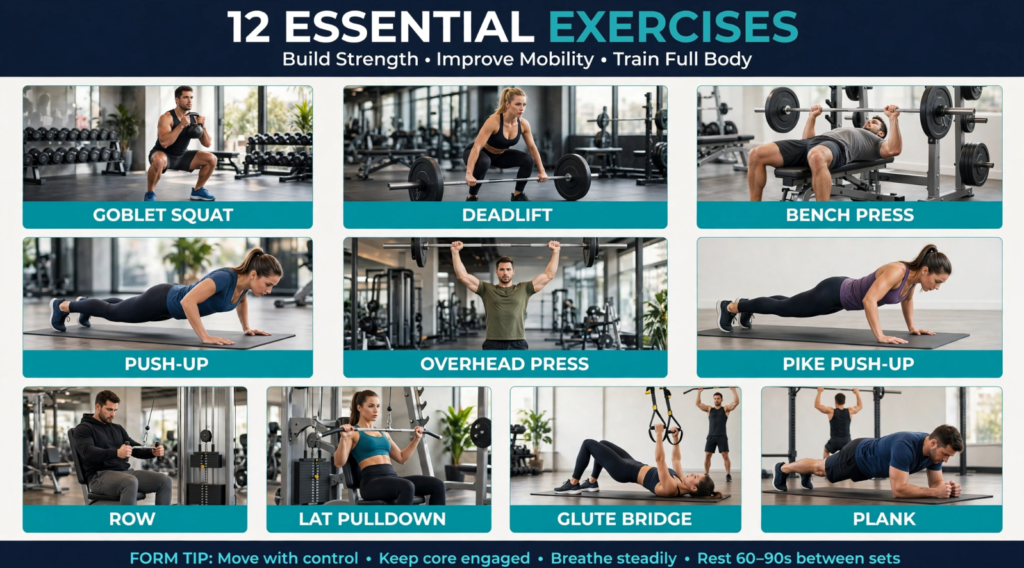
Goblet Squat (Dumbbell or Kettlebell)
Perfect for: Beginners learning squat mechanics, developing core stability, and building lower body strength.
- Hold a dumbbell or kettlebell vertically against your chest, cupping the top with both hands
- Feet slightly wider than shoulder-width, toes slightly turned out
- Squat down, keeping your chest up and core braced
- Drive through your heels to return to standing
Why it’s great: The weight in front of you acts as a counterbalance, making it easier to stay upright. This is an excellent teaching tool for proper squat mechanics.
Barbell Back Squat
The classic: The standard for building maximal lower body strength.
High Bar vs. Low Bar:
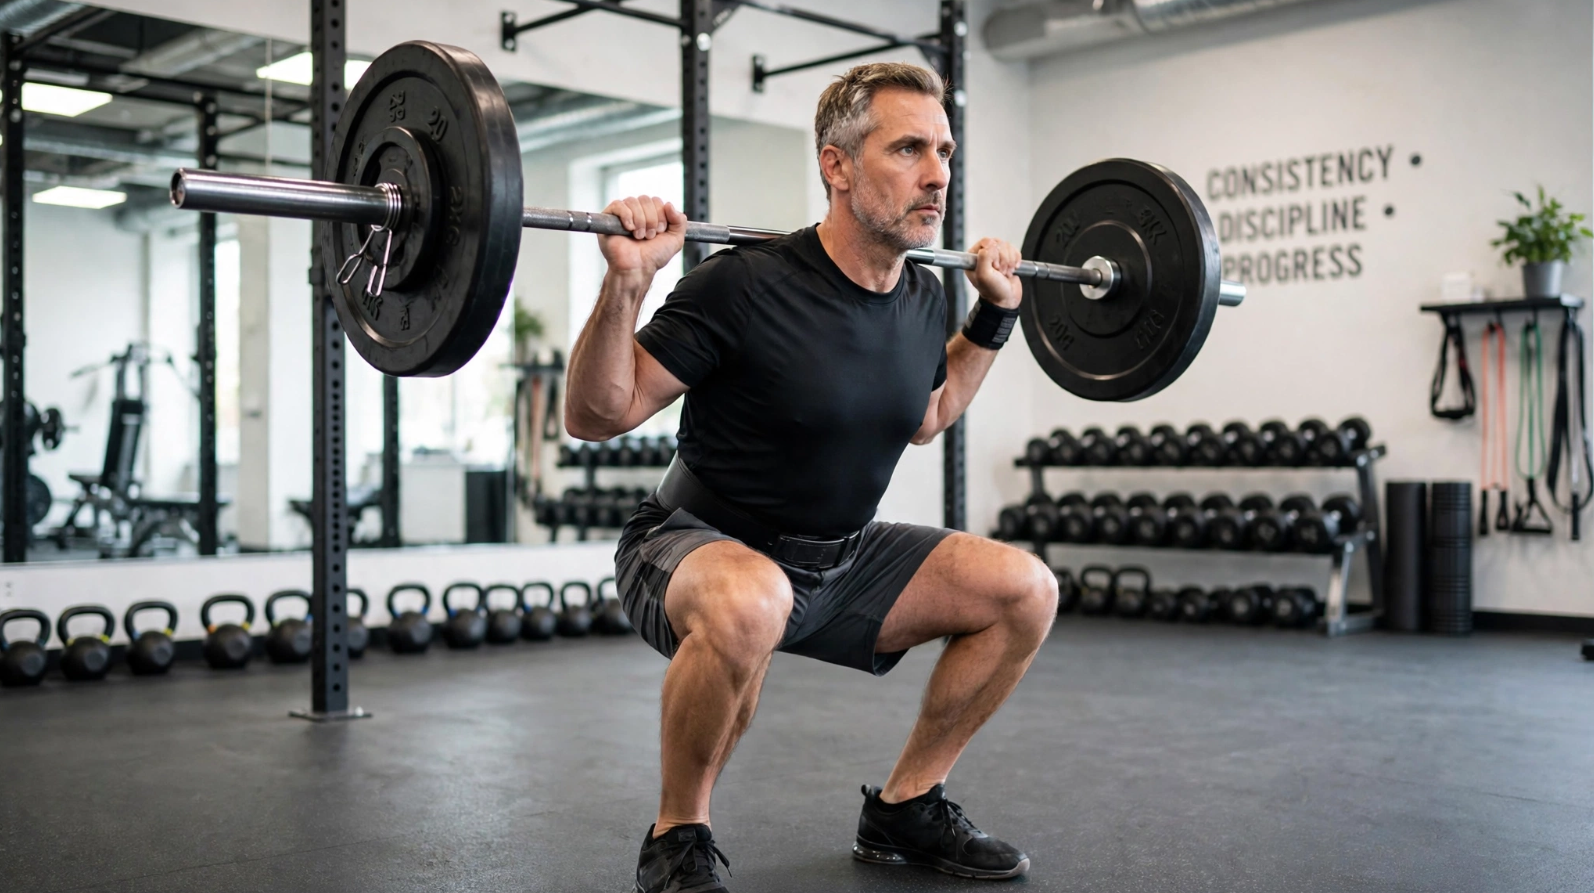
- High Bar: Barbell positioned on your upper traps (the fleshy part at the base of your neck). This position requires more upright posture and emphasizes the quads.
- Low Bar: Barbell positioned lower on your back, across your rear delts. This position allows more forward lean and emphasizes the glutes and hamstrings.
Form:
- Position the bar on your back (high or low bar, depending on preference)
- Grip the bar slightly wider than shoulder-width
- Unrack the bar, step back, and set your stance
- Take a deep breath, brace your core
- Squat to depth, maintaining a neutral spine
- Drive through your heels to return to standing
Barbell Front Squat
Perfect for: Building quad strength, developing core stability, and improving squat mechanics.
- Rest the bar across your front shoulders (not your neck)
- Cross your arms or use a clean grip (fingertips under the bar, elbows high)
- Keep your elbows high and chest up throughout the movement
- Squat to depth
- Drive through your heels to return to standing
Why it’s great: The front squat forces an upright torso position—if your chest drops, the bar will fall. This builds core strength and teaches proper squat mechanics.
Dumbbell Squat
Perfect for: Home workouts, beginners, and those without a barbell.
- Hold a dumbbell in each hand at your sides (or one heavy dumbbell at your chest)
- Feet slightly wider than shoulder-width
- Squat down, keeping your chest up and core braced
- Drive through your heels to return to standing
Bulgarian Split Squat
Perfect for: Building unilateral strength, improving balance, and addressing muscle imbalances.
- Stand facing away from a bench or chair, one foot resting on the bench behind you
- Front foot positioned so your knee tracks over your toes at the bottom of the squat
- Lower into a lunge, front knee bending to 90 degrees
- Drive through your front heel to return to standing
Why it’s great: This exercise builds leg strength, stability, and balance. It also addresses muscle imbalances between your left and right sides.
Section 4: Common Squat Mistakes (And How to Fix Them)
Mistake 1: Knee Cave (Valgus Collapse)
What it looks like: Your knees cave inward as you descend or ascend.
Why it’s a problem: This places excessive stress on the knee joint, particularly the medial collateral ligament (MCL) and the ACL. It’s also a sign of weak glute medius muscles.
The Fix:
- Actively push your knees out throughout the movement—imagine “spreading the floor” with your feet
- Strengthen your glute medius with exercises like clamshells, side-lying leg lifts, and banded lateral walks
- Narrow your stance slightly if knee cave persists
Mistake 2: Butt Wink (Posterior Pelvic Tilt at the Bottom)
What it looks like: At the bottom of the squat, your pelvis tucks under, and your lower back rounds.
Why it’s a problem: This places excessive stress on your lumbar spine and discs. Over time, it can lead to back pain and injury.
The Fix:
- Squat only to the depth where you can maintain a neutral spine—don’t force depth
- Improve ankle mobility (tight ankles cause you to lean forward, which can cause butt wink)
- Strengthen your core and glutes
- Work on hip mobility with exercises like deep squats with holds and hip flexor stretches
Mistake 3: Leaning Too Far Forward
What it looks like: Your upper body leans forward excessively, and your heels lift off the floor.
Why it’s a problem: This shifts the load to your lower back and reduces quad and glute activation. It also increases stress on your lumbar spine.
The Fix:
- Keep your chest up and proud—look straight ahead or slightly up
- Push your hips back first, not your knees forward
- Improve ankle mobility—if your ankles are tight, you’ll lean forward
- Try a wider stance or turned-out toes
- Practice goblet squats—the weight in front acts as a counterbalance
Mistake 4: Not Going Deep Enough
What it looks like: You only lower your body a few inches—nowhere near parallel.
Why it’s a problem: You’re missing the most effective part of the squat. Partial squats only work a fraction of your muscle fibers and don’t build the full range of motion that supports daily life.
The Fix:
- Aim for at least parallel (hip crease below knee crease)
- If you can’t reach parallel, improve mobility (especially hip and ankle)
- Use a box or bench to squat to—this gives you a target and builds confidence
- Reduce the weight if needed—depth matters more than load
Mistake 5: Hyperextending at the Top
What it looks like: At the top of the squat, you excessively arch your lower back and push your hips forward.
Why it’s a problem: This compresses your lumbar spine and can lead to lower back pain over time.
The Fix:
- Squeeze your glutes at the top but don’t push your hips forward
- Maintain a neutral spine—slightly arched, not hyperextended
- Think about standing tall rather than “thrusting”
Mistake 6: Holding Your Breath
What it looks like: You hold your breath throughout the entire rep.
Why it’s a problem: This can cause dizziness, increased blood pressure, and reduced force production.
The Fix:
- Take a deep breath into your belly at the top of the squat
- Hold your breath during the descent and ascent (the Valsalva maneuver is safe for most people—but not for those with high blood pressure or glaucoma)
- Exhale at the top of the squat or as you pass the sticking point
- For lighter weights, you can exhale during the ascent
Section 5: Mobility—The Secret to a Better Squat
Many squat issues aren’t strength problems—they’re mobility problems. Here’s how to improve the mobility needed for a perfect squat.
Ankle Mobility
Tight ankles are a common cause of squat problems. If your ankles don’t have enough dorsiflexion (the ability to bring your shin forward), you’ll lean forward to compensate.
Exercises to Improve Ankle Mobility:
- Ankle Stretch with Band:
- Place a resistance band around your ankle and anchor it to something sturdy
- Lean forward, pushing your knee past your toes
- Hold for 30 seconds, repeat 3 times
- Calf Stretch (Heel Drop):
- Stand on the edge of a step, heels hanging off
- Slowly lower your heels below the step
- Hold for 30 seconds, repeat 3 times
- Tibialis Raise:
- Lean against a wall, feet hip-width apart
- Lift your toes toward your shins, keeping your heels on the floor
- Repeat for 20 reps, 3 sets
Hip Mobility
Limited hip mobility prevents you from reaching depth while maintaining a neutral spine.
Exercises to Improve Hip Mobility:
- Deep Squat Hold:
- Squat down as deep as you can while maintaining a flat back
- Use your elbows to push your knees out
- Hold for 30–60 seconds
- Hip Flexor Stretch:
- Kneel on one knee, other foot forward
- Push your hips forward until you feel a stretch in the front of your hip
- Hold for 30 seconds, repeat on the other side
- 90/90 Stretch:
- Sit on the floor with one leg bent forward at 90 degrees and the other leg bent back at 90 degrees
- Lean forward, keeping your back straight
- Hold for 30 seconds, repeat on the other side
Thoracic Spine Mobility
Limited upper back mobility can cause your chest to collapse forward during the squat.
Exercises to Improve Thoracic Mobility:
- Cat-Cow Stretch:
- Start on all fours
- Alternate between arching your back (cat) and dropping your belly (cow)
- Repeat for 10 breaths
- Thoracic Rotation:
- Lie on your side, knees bent, arms extended
- Rotate your top arm up toward the ceiling, following it with your eyes
- Hold for 2 seconds, return to start
- Repeat 10 times on each side
- Foam Roller Thoracic Extension:
- Lie on your back with a foam roller under your upper back
- Support your head with your hands
- Gently arch over the foam roller
- Hold for 30 seconds
Section 6: How to Program Squats into Your Routine
For Beginners
Goal: Build strength and confidence with proper form.
Frequency: 2 times per week
Workout:
- Perform bodyweight squats or goblet squats
- 3 sets of 10–15 reps
- Rest 60–90 seconds between sets
- Focus on form over weight
Progression:
- Week 1–2: Bodyweight Squats (3 sets of 10–15)
- Week 3–4: Goblet Squats (3 sets of 10–12)
- Week 5–6: Goblet Squats (4 sets of 10–12, slightly heavier)
- Week 7–8: Barbell Squats (3–4 sets of 8–10, light weight)
For Intermediate
Goal: Build strength and muscle size.
Frequency: 2 times per week
Workout:
- Perform barbell squats as your primary squat variation
- 3–4 sets of 6–10 reps
- Rest 90–120 seconds between sets
- Include accessory work (leg press, lunges, leg extensions)
Sample Squat Session:
- Barbell Squats: 4 sets of 6–10 reps
- Dumbbell Lunges: 3 sets of 10–12 reps per leg
- Leg Press: 3 sets of 12–15 reps
- Calf Raises: 3 sets of 15–20 reps
For Advanced
Goal: Maximize strength and address weak points.
Frequency: 2 times per week
Workout:
- Perform squats as your main lift
- Use periodization (vary volume and intensity)
- Include variations to address weaknesses (e.g., front squats for quad strength, pause squats for stability)
Sample Squat Session:
- Barbell Squats: 5 sets of 5 reps (heavy)
- Pause Squats: 3 sets of 5 reps (pause for 2–3 seconds at the bottom)
- Bulgarian Split Squats: 3 sets of 8–10 reps per leg
- Core Work: 3 sets of Planks (60 seconds)
Sample Weekly Schedule
| Day | Focus | Squat Variation |
|---|---|---|
| Monday | Lower Body A | Barbell Back Squat (Heavy) |
| Tuesday | Upper Body | — |
| Wednesday | Lower Body B | Front Squat or Goblet Squat (Lighter) |
| Thursday | Upper Body | — |
| Friday | Lower Body C | Accessory Work (Lunges, Leg Press) |
| Saturday | Active Recovery | — |
| Sunday | Rest | — |
Section 7: Squatting with Knee Issues
If you have knee pain, don’t avoid squats altogether—but be smart about it.
Tips for Squatting with Knee Pain
- Start with Bodyweight Only:
- Master the movement pattern without added load
- Focus on form—if squats hurt, something is wrong with your form
- Box Squats:
- Squat to a box or bench
- This reduces range of motion and provides a target, building confidence
- Reduce Range of Motion:
- Only squat to the depth that doesn’t cause pain
- Gradually increase depth as your strength and mobility improve
- Strengthen Supporting Muscles:
- Strengthen your glutes (hip abduction exercises, clamshells)
- Strengthen your quads (leg extensions, wall sits)
- Strengthen your hamstrings (leg curls, Romanian deadlifts)
- Stronger supporting muscles reduce load on the knee joint
- Warm Up Thoroughly:
- Spend extra time warming up your knees
- Light cardio, leg swings, air squats, and mobility work
- Use Knee Sleeves:
- Knee sleeves provide warmth, support, and proprioceptive feedback
- They can help reduce pain and improve confidence
- Consult a Professional:
- If pain persists, see a physical therapist or sports medicine professional
- They can assess your squat and address any underlying issues
Section 8: Squat Depth—How Low Should You Go?
This is one of the most debated questions in strength training.
The Case for Full Depth (Ass-to-Grass)
- Activates more muscle fibers, particularly in the glutes
- Builds greater range of motion and flexibility
- More functional—daily activities require full depth
- Can reduce knee stress by distributing load more evenly across the joint
The Case for Parallel
- Less demand on mobility—more accessible for many people
- May be safer for those with certain joint issues
- Still effective for building strength and muscle
- The standard in powerlifting competitions
The VigorForty Recommendation
Go as deep as you can while maintaining a neutral spine and proper form.
- For most people, this is at least parallel (hip crease below knee crease)
- If you can go deeper with good form, do it
- If you can’t reach parallel, work on mobility
- Don’t force depth if it causes your lower back to round or your heels to lift
Section 9: FAQ—Your Top Squat Questions
Q: Should I squat heavy or light?
A: Both have their place. Heavy squats (3–6 reps) build maximal strength. Moderate squats (8–12 reps) build muscle size. Lighter squats (15–20 reps) build muscular endurance. Include a mix depending on your goals.
Q: Is the squat bad for your knees?
A: No—when done correctly, the squat is safe and beneficial for knee health. In fact, the squat strengthens the muscles and connective tissues around the knee. However, poor form (knee cave, leaning too far forward, too much weight too soon) can cause problems.
Q: How deep should I squat?
A: As deep as you can while maintaining a neutral spine and proper form. For most people, this is at least parallel. If you have mobility issues, work on them—but don’t force depth at the expense of form.
Q: Should my knees go past my toes?
A: Yes—this is normal and biomechanically safe. The “knees shouldn’t pass toes” myth has been debunked. In a proper squat, your knees will move forward, especially in a high-bar squat or with longer femurs. What matters is that your knees track over your toes (or slightly outside) and your weight is centered over your mid-foot.
Q: I have lower back pain when squatting. What should I do?
A: Common causes include:
- Rounding your back (butt wink)—squat to a depth where you can maintain a neutral spine
- Leaning too far forward—keep your chest up, push your hips back first
- Weak core—strengthen your core with planks, dead bugs, and bird dogs
- Weak glutes—add glute bridges and hip thrusts to your routine
If pain persists, consult a physical therapist or qualified trainer.
Q: Should I use a squat rack or Smith machine?
A: A squat rack (with a barbell) is generally better because it allows natural movement patterns. A Smith machine locks you into a fixed path, which can stress joints and limit muscle activation. However, a Smith machine can be helpful for beginners learning the movement or for those with specific injuries.
Q: What equipment do I need to squat?
A: For beginners, nothing—bodyweight squats are excellent. For intermediate and advanced training:
- A barbell and plates
- A squat rack (for safety)
- A bench (for box squats or seated variations)
- Dumbbells (for goblet squats)
- Flat-soled shoes (Chuck Taylors, weightlifting shoes) or no shoes
The VigorForty Take
The squat is more than just an exercise. It’s a fundamental human movement, a test of strength and mobility, and a cornerstone of a healthy, functional body.
Here’s the truth: A perfect squat takes time to develop. It requires strength, yes—but also mobility, coordination, and body awareness. Most people need to practice and refine their squat mechanics over weeks and months. That’s normal. That’s how you build a movement that lasts a lifetime.
Start where you are. Bodyweight squats. Goblet squats. Light barbell squats. Focus on form, depth, and control. Progress slowly. Be patient with yourself.
A good squat will serve you in ways you might not expect:
- Easier everyday movement (getting out of chairs, climbing stairs, picking things up)
- Stronger, more stable knees and hips
- Improved bone density (critical for preventing fractures as you age)
- Better athletic performance (running, jumping, cycling)
- A strong, powerful physique
The squat is the foundation. Build it strong.
This article was reviewed by the Vigor Forty Editorial Review Board on July 19, 2026.
🔗 Related Articles
- The Ultimate Beginner’s Guide to Strength Training
- Weightlifting 101: A Simple Guide for Beginners
- Calisthenics for Beginners: Your First Bodyweight Workout Plan
- 5 Foundational Movement Patterns for a Stronger Body
Affiliate Disclosure: Some links in this article may be affiliate links. If you make a purchase through these links, Vigor Forty may earn a small commission at no extra cost to you. We only recommend products we trust.
Related Articles
- The Ultimate Beginner’s Guide to Strength Training (Weightlifting, Calisthenics, and Core)
- Weightlifting 101: A Simple Guide for Beginners
- Calisthenics for Beginners: Your First Bodyweight Workout Plan
- What is Core Stability and Why Does It Matter for Every Lift?
- 5 Foundational Movement Patterns for a Stronger Body
- Perfect Your Push-Up: A Step-by-Step Guide to Building Upper Body Strength
- How to Perform a Perfect Squat: Form Tips for Weightlifting and Bodyweight
- The Plank: More Than Just an Ab Exercise
- How to Combine Calisthenics and Weight Training for Maximum Results
- Sample Weekly Workout Plan: Combining Weights, Bodyweight, and Core
- The Importance of Progressive Overload in Strength Training
- How to Progress Calisthenics Exercises When Bodyweight Gets Easy
- Home Gym vs. Gym Membership: Which is Right for You?
- The Minimalist’s Guide to Strength Training: No Equipment Needed
- Top 5 Pieces of Equipment for a Home Strength Training Setup
- How to Choose the Right Weight for Your Workouts